Installing Python. Tutorials For Mike Series
June 14th, 2020
I'm dedicating a separate post to Python installation. This will be a very long post that would cover different ways of installing Python, virtual environment concept, Python packages, and Python editors. I tried to be as detailed as possible.
When you download Python, make sure to download most recent version of Python 3. There is also Python 2 which I wouldn't recommend because there are some differences in syntax and a lot of Python libraries that constantly get updated will stop supporting Python 2 at some point in the future. You can install Python directly or you can install Anaconda distribution of Python. Both are free and open-source.
Anaconda
Anaconda is highly praised by the data science community since it comes with a couple of cool ways to write Python code by using Jupyter Notebook which I frequently use for data science purposes or if you've used R before and used to R studio, then you can try Spyder. It also comes pre-installed with tons of packages.
One disadvantage is it takes up too much disk space. I tried installing Anaconda when I just started learning Python but perhaps I didn't spend much time trying to get comfortable with it and ran into a few issues (one caused by my antivirus another happened on my work computer probably related to a web proxy issue) and gave up.
I'll cover my set up that I'm most comfortable with below. I might revisit Anaconda installation at some point in the future since it's so highly praised by my team. Here are a few links you could use to install Anaconda on your machine:
My Setup
Python Editors
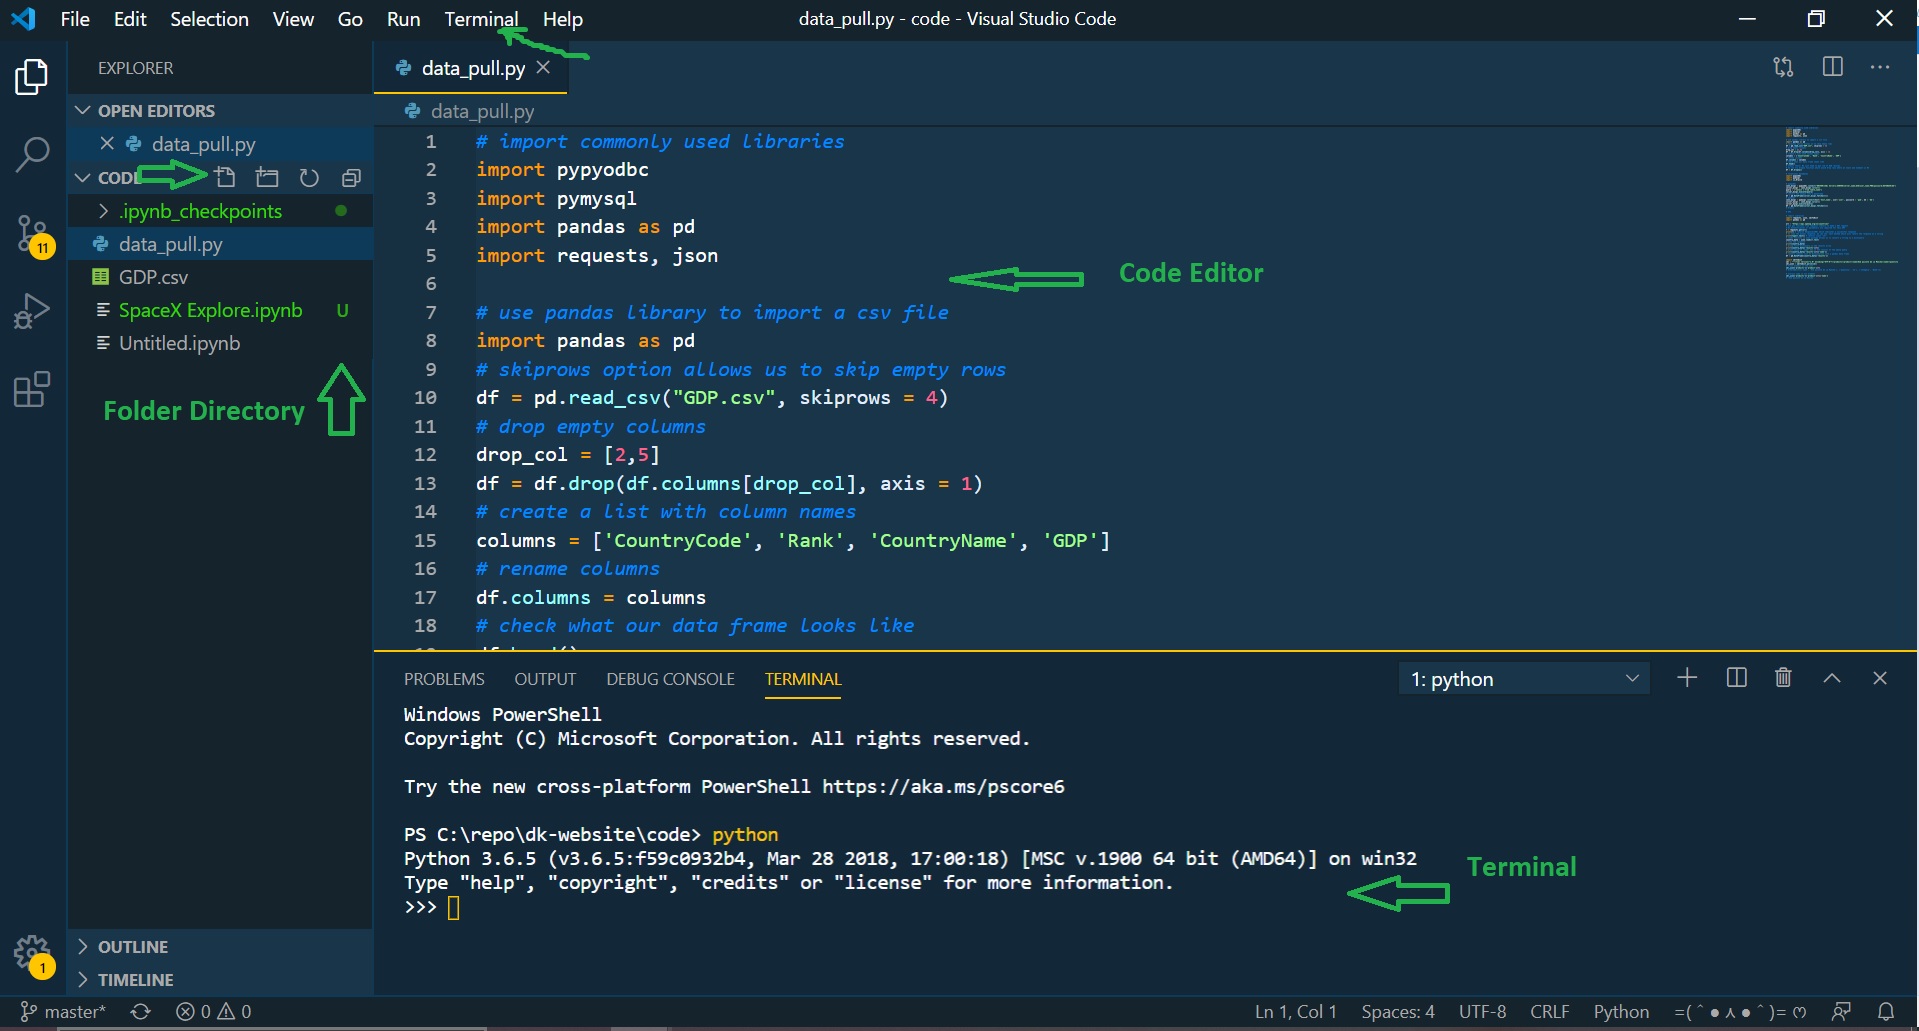
I like using VS Code as my code editor. I mainly use it for Python, HTML, CSS, and JavaScript, but it supports a variety of languages. You can download it from code.visualstudio.com.
When I start working on a new Python project, I create a new directory on my computer, in the example below it's called "Code". That's where I store all files relevant to that project.
In order to open that directory in VS Code, you would go to File => Open Folder => Select the folder you would like to Open which imports that directory into VS Code. You can see the folder contents on the left. If you want to add scripts to that folder, you would click on a "file with a +" icon.
When you name a file, you need to specify its extension depending on the language you are working in. That way, you'll tell VS Code the correct language. For instance, if you work with a Python file, you would name it "my_first_script.py". When it comes to naming a file, you need to follow certain conventions:
- ✓ File name can only contain letters or numbers
- ✓ File name can only start with a character or an underscore (_)
- ✓ You can use snake case (snake_case_file_name) or camel case (camelCaseFileName) when you name your files. This is mainly used for readability, you wouldn't want to inherit a file named like
thisisafilename1idontknowwhatitdoeswhich brings me to my next point - ✓ Be descriptive with your file names
The terminal allows you to run the entire script, or you can run one line at a time to see what the output is. This is the setup I use for developing purposes.
In order to write python scripts in VS Code, you will need to download Python from https://www.python.org/downloads/. You'll just need to follow the installation procedure which is very simple. The only caveat is on the first screen you will see a checkbox saying "Add Python to PATH" . It's unselected by default, so make sure to select it. It will make it easier running python scripts from the command line . The only time it's not recommended to check that box if you have multiple versions of Python installed.
Install Libraries
Many tasks in Python can be accomplished by utilizing its libraries. For instance, if you'd like to plot a chart, you would use matplotlib or seaborn library. They do not come pre-installed with Python (unless you are using Anaconda).
There is a special way on how you can install them using pip install command. If you try importing a library before installing it, you will get a No module named "module_name" message which means you need to install it.
Before I jump into how to install a library in Python, I'll cover a Virtual Environment concept. It's a good practice to use a virtual environment for when you work on Python projects and need to install specific packages.
The reason why it's useful is because some applications may require a specific version of a library. Here is a step-by-step instruction on how to create a virtual environment using your terminal in VS Code. It's important to note that I'm using Windows 10 which has different terminals and may have slightly different commands.
- ✓ If you don't have a terminal window in your VS Code, click on Terminal=>New Terminal. The default terminal selection in Windows 10 is Power Shell, you could switch it to Command Line by typing cmd. Sometimes in very specific cases it matters which terminal you use, but in most cases you can leave it as default
- ✓ Make sure you have python correctly installed. Type
python --versionin your terminal. It should return something like Python 3._._ - ✓ To install a virtual environment, use the following command
python -m pip install --user virtualenv. If you already have a virtual environment package, you will see Requirement already satisfied message. Make sure there were no errors returned. - ✓ I typically create virtual environments somewhere on my C drive separate from my projects (you can use
cdcommand to navigate to the right folder). There are typically three directories generated when you create a virtual environment -- Include, Lib, and Scripts and you wouldn't want to clutter your working project directory - ✓
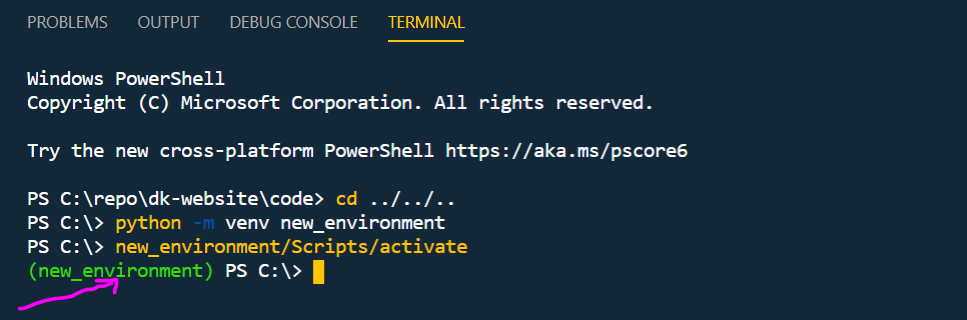
cdcommand crash course. You can think of this command analogues to you pointing a mouse to a folder and clicking to open it. Great if you have a mouse, but in some cases, you may not have access to it, and to get around it, you can use a terminal and various commands. To open a particular directory by path, you would docd C:\Exact_Path_Here. To go up a level up from the directory where you are currently working, you would usecd ... If you want to go two directories up, you would docd ../.., and so on. To go to the root directory (which may be C:\users\user_name, C: or something else), you would docd \. - ✓ Running
python -m venv new_environmentshould create a new virtual environment for you. You can name your environment anything you want; it doesn't have to be new_environment. Make sure there are no errors returned - ✓ You will see on your C drive (if that's where you ran the command), a new folder called new_environment is created. So you can think about a virtual environment as a folder that contains python libraries that you install
- ✓ The last step is to activate your virtual environment which you would do by running
new_environment/Scripts/activate
This is what a successful activation of a virtual environment should look like.
Now that you are in a virtual environment you can start installing packages that you need. For most packages you can use pip install command. You may see a lot of messages generated by pip install depending on the package you are trying to install. Some packages aren't as straightforward to install if you are installing them on Windows and may require extra research on how to install them. If there are no errors listed after you run pip install and if import library_name doesn't return No module named "library_name" message, then you successfully installed your first library!
Jupyter Notebook
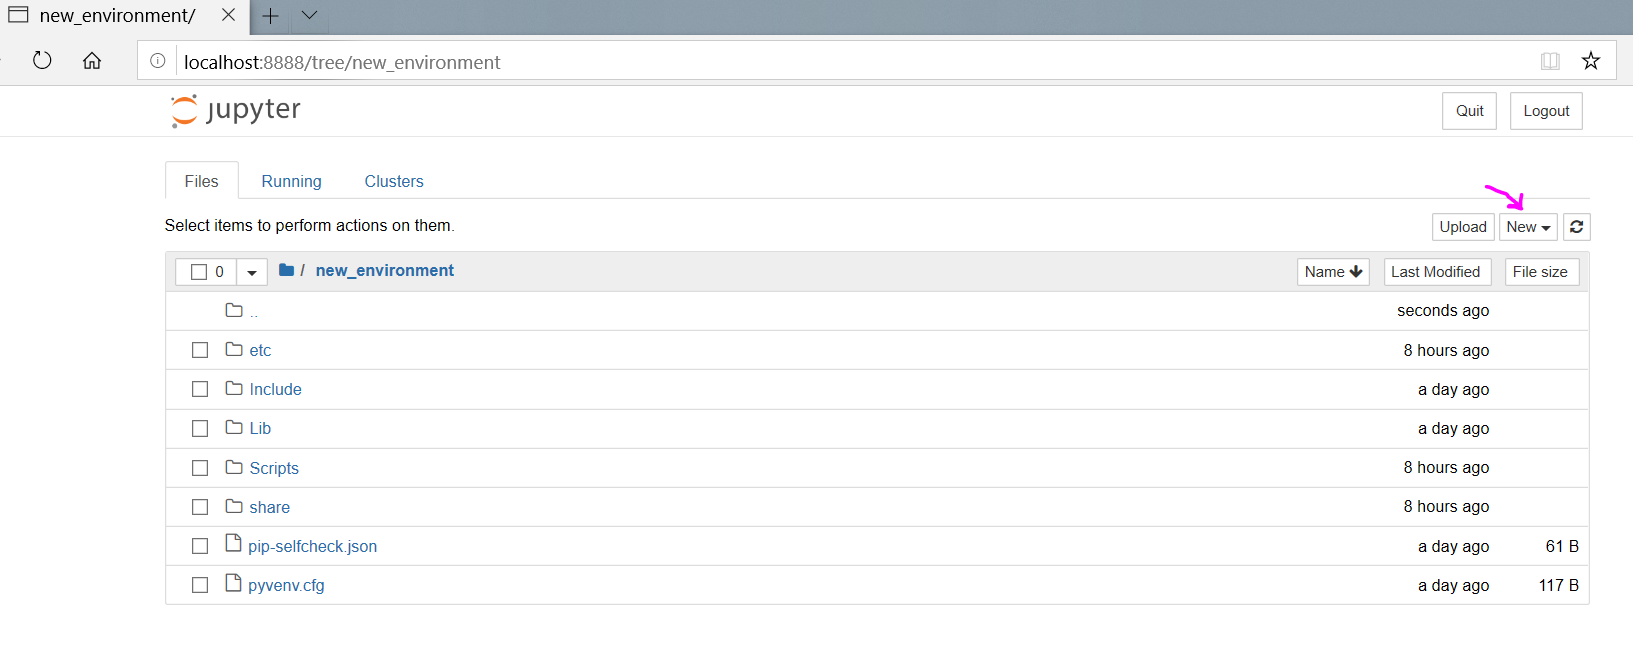
While I like using VS Code, for most projects related to analytics, Jupyter Notebook works much better. If you followed successfully all the steps above, you can now install Jupyter Notebook with pip install jupyter notebook command. Now you can simply run jupyter notebook in your terminal which would open up a page in your default browser that would look like this: